futuristic button tutorial |by pauldohrequirements:
::photoshop 7.0 or higher
::patience
::best for black background..
outcome:
ever wanted to see glossy/shiny buttons on your naviations?..
here a tutorial on how to make asimple, yet attractive one.
step 1.
-create a new project.(width=200px,height=100px)
-now, fill it with black.(#000000)

step 2.
-make a new layer set and name it BUTTON.
-then hit ctrl+shift+N to make a new layer.
step 3.
-grab the eliptical marquee tool and set its settings to this:
-now click on the middle-left side of the layer BUTTON to have
a 25x25px circle.
-fill it with white.(#ffffff).. so you have this:

step 4.
-hold shift and press right arrow key 10 times to drag the cirlcle 100px to the right.
-fill it with white.(#ffffff)
-hit ctrl+D to deselect.

step 5.
-grab the rectangular marquee tool and set the settings to this:
-click on the same layer, and try to overlap the rectangle marquee
halfway of the white circle.
-then fill it with white.
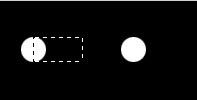
step 6.
-hold shift and press right arrow key 5 times to drag the cirlcle 50px to the right.
-now we have this outcome:

step 7.
::you now have the shape of our button.. all you have to do now
is apply the following blending options.
-right click BUTTON layer and hit "BLENDING OPTIONS".
-apply these settings:
inner shadow
outer glow
inner glow
gradient overlay
satin
stroke
::now we have a attractive shiny button. looking bare right?.. its now
time to apply the text/link and u should have something like thhis for now:

step 8.
-grab the text tool and type the the link you want to put on the button.
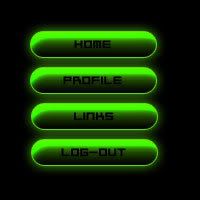
:VIOLA!!! you now have a glossy button for a futuristic navigations..
here's my finished product.:
 ::TIP: just duplicate the layer set of the button we made to have another button without
repeating the steps.
::if you want to change the color of your button, change all green color in the blending options..
::always remember to experiment. 


